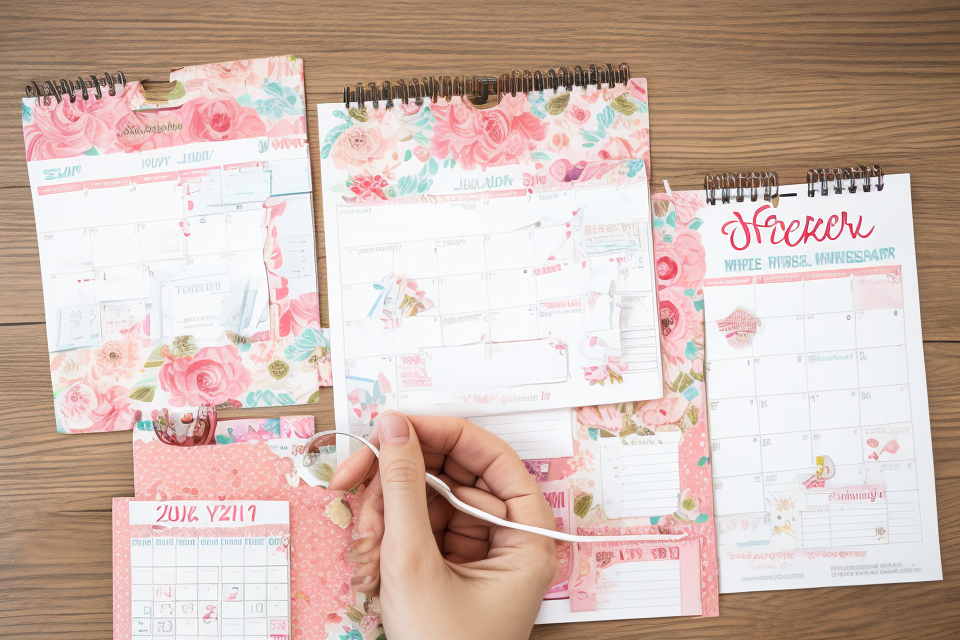
Are you tired of buying expensive calendars that don’t quite match your style? Do you want to create a personalized calendar that’s uniquely yours? Then it’s time to try DIY calendar crafts! With just a few simple materials and some creativity, you can make your own personalized calendar that’s perfect for your home or office. From recycled materials to craft store finds, there are endless options for creating a one-of-a-kind calendar that you’ll love. So why not give it a try? With a little bit of time and effort, you can create a beautiful and functional calendar that you’ll be proud to display all year long.
Choosing the Right Materials for Your DIY Calendar
Types of Materials to Use
When it comes to creating your own personalized calendar, the options for materials are practically endless. However, to get started, it’s important to familiarize yourself with the most common types of materials used in DIY calendar crafts. Here are some popular options to consider:
Paper
Paper is one of the most versatile and readily available materials for creating a DIY calendar. Whether you opt for plain printer paper or something more decorative like construction paper or cardstock, paper is a great option for those who want to keep things simple and budget-friendly. You can also get creative with paper cutouts, glitter, and glue to add some extra flair to your calendar.
Cardboard
Cardboard is another popular material for DIY calendar crafts. It’s affordable, lightweight, and easy to work with, making it a great option for those who are new to DIY projects. You can use corrugated cardboard or thick cardboard to create a sturdy base for your calendar, and then add layers of paint, paper, and other embellishments to make it your own.
Fabric
Fabric is a great option for those who want to create a more textured and tactile calendar. You can use a variety of fabrics, including cotton, silk, and linen, to create a unique and personalized calendar. You can also add beads, buttons, and other embellishments to add some extra texture and visual interest.
Wood
Wood is a more advanced material for DIY calendar crafts, but it can yield some stunning results. You can use a variety of woods, including pine, oak, and maple, to create a rustic and natural-looking calendar. You can also sand, stain, and paint the wood to create a customized look that fits your personal style.
Overall, the key to choosing the right materials for your DIY calendar is to consider your personal style, budget, and skill level. With a little creativity and experimentation, you can create a calendar that is truly one-of-a-kind and reflects your personal style.
Tips for Choosing Materials
When it comes to creating your own personalized calendar, choosing the right materials is crucial. Here are some tips to help you make the right choice:
- Consider the design and style you want to achieve: The materials you choose will play a big role in determining the overall look and feel of your calendar. For example, if you want a rustic look, you might choose natural materials like burlap or wood. If you want a more modern look, you might choose sleek materials like metal or plastic.
- Think about the durability and practicality of the material: Your calendar will be used throughout the year, so it’s important to choose materials that can withstand the wear and tear of daily use. Consider factors like tear resistance, water resistance, and stain resistance when making your choice.
- Choose materials that are easily accessible and affordable: While there are many beautiful and unique materials out there, it’s important to choose ones that you can easily find and afford. Consider materials that are commonly available in your area or that you can purchase online at a reasonable price.
Simple DIY Calendar Ideas
1. Paper Calendar
Instructions:
- Gather necessary supplies: paper, scissors, ruler, pen or pencil.
- Cut the paper: Cut the paper into the desired size for your calendar.
- Fold the paper: Fold the paper in half to create the two pages of the calendar.
- Write the dates and important events: Write the dates and important events on the calendar.
Tips:
- Consider using different colors or patterns for the cover page to make it more visually appealing.
- If you want to add a more personal touch, you can include pictures or drawings on each page.
- To make it easier to read, use a pen or marker to write the dates and events.
- Consider adding a small pocket to the back of the calendar to hold notes or reminders.
2. Cardboard Calendar
If you’re looking for a simple and budget-friendly way to create your own personalized calendar, then a cardboard calendar is a great option. Here’s how you can make one:
- Supplies needed: cardboard, scissors, ruler, paint or markers
- Instructions:
- Cut the cardboard into the desired size for your calendar. You can choose the size that works best for you, depending on how many months you want to display and where you plan to hang it.
- Paint or draw on the cardboard to create a design. You can paint it with your favorite color or draw on it with markers to create a unique design that reflects your personality or style.
- Add the dates and important events to the calendar. Once you’ve finished decorating the cardboard, you can use a ruler and a pen to mark the dates and any important events or holidays that you want to remember. You can also add photos or other mementos to make it more personal.
By following these simple steps, you can create a personalized calendar that you can use to keep track of important dates and events throughout the year. It’s a fun and creative way to stay organized and make your space more personal.
3. Fabric Calendar
Create a personalized fabric calendar that is not only functional but also adds a touch of style to your home. Here’s how to make one:
Supplies needed:
- Fabric: choose a light-colored fabric for the background and a darker color for the text and borders
- Scissors: to cut the fabric
- Ruler: to measure and cut the fabric
-
Thread and needle: to sew the fabric together
-
Cut the fabric into the desired size for your calendar. For example, you could cut a piece of fabric that is 12 inches by 12 inches for a small calendar or 24 inches by 18 inches for a larger one.
- Sew the fabric together to create the two pages of the calendar. Use the ruler to ensure that the fabric is straight and that the edges are aligned properly. Use the thread and needle to sew the fabric together along the edges.
- Add the dates and important events to the calendar. Use a darker fabric for the text and borders, and a white fabric pen or fabric paint to write the dates and events on the calendar.
By following these simple steps, you can create a unique and personalized fabric calendar that will help you keep track of important dates and events throughout the year.
Advanced DIY Calendar Ideas
1. Wooden Calendar
If you’re looking for a unique and rustic calendar craft, the wooden calendar is a great option. With a little bit of woodworking skills and creativity, you can turn a piece of wood into a beautiful and functional calendar.
- Wood
- Saw
- Sandpaper
- Paint or stain
-
Nails or screws
-
Cut the wood into the desired size for your calendar. This will depend on how big you want your calendar to be and how much wood you have available.
- Sand the wood to create a smooth surface. This will help the paint or stain to adhere better and give your calendar a smoother finish.
- Paint or stain the wood to create a design. You can choose any design you like, such as a simple solid color, a pattern, or a image that inspires you.
- Add the dates and important events to the calendar. You can use nails or screws to attach small pieces of paper or cardboard to the wood, where you can write down the dates and events.
The wooden calendar is a great way to add a personal touch to your calendar craft, and it can also be a fun and rewarding project to work on. It’s also a great way to reuse old wood that you may have lying around your home. With a little bit of effort and creativity, you can create a unique and beautiful wooden calendar that you can use all year round.
2. Wall Calendar
If you’re looking for a functional and stylish calendar that can be displayed on your wall, then a wall calendar is the perfect option for you. With just a few simple supplies and some creative ideas, you can create a customized wall calendar that suits your taste and style.
Supplies needed:
- Foam board
- Markers
- Ruler
- Glue
Instructions:
- Cut the foam board into the desired size for your calendar. The size will depend on how many months you want to display and how much space you have on your wall.
- Draw on the calendar grid on the foam board. You can use a ruler to ensure that the grid is straight and even.
- Add the dates and important events to the calendar. Use markers to write down the dates and any important events or reminders that you want to keep track of.
- Attach the calendar to the wall with glue or nails. You can use tacky glue to attach the calendar to the wall, or you can use nails to create a more permanent display.
By following these simple steps, you can create a customized wall calendar that adds a personal touch to your home decor. With a little bit of creativity and some basic supplies, you can turn your foam board into a beautiful and functional piece of art that will help you stay organized throughout the year.
Customizing Your DIY Calendar
Adding Personal Touches
Creating a personalized calendar is a great way to keep track of important events and memories throughout the year. By adding personal touches to your DIY calendar, you can make it unique and reflective of your personality. Here are some ideas for adding personal touches to your DIY calendar:
- Use photos or images that represent important events or memories: You can use photos or images that represent important events or memories from the past year, such as weddings, graduations, or vacations. These images can be printed on paper or printed on photo paper and attached to the calendar with glue or tape.
- Include motivational quotes or inspirational messages: Adding motivational quotes or inspirational messages to your calendar can help you stay motivated and focused throughout the year. You can write these quotes or messages on sticky notes and attach them to the calendar, or you can print them out and attach them to the calendar with glue or tape.
- Add custom colors or patterns to make the calendar unique: You can add custom colors or patterns to your calendar to make it unique and reflective of your personality. You can use markers, paint, or stickers to add colors and patterns to the calendar, or you can print out custom designs and attach them to the calendar with glue or tape.
By adding personal touches to your DIY calendar, you can create a unique and personalized tool for keeping track of important events and memories throughout the year.
Making it Practical
Creating a DIY calendar that is practical and functional is essential for anyone who wants to stay organized throughout the year. Here are some tips for making your DIY calendar practical:
Choose a design that makes it easy to read and write on
One of the most important aspects of a DIY calendar is its design. You want to choose a design that is easy to read and write on. This means using a font that is clear and easy to read, and using a color scheme that is easy on the eyes. You may also want to consider adding a key or legend to your calendar to help you quickly identify important dates and events.
Add pockets or compartments for storing important items
Another way to make your DIY calendar practical is to add pockets or compartments for storing important items. This could include things like receipts, notes, or other papers that you want to keep track of throughout the year. You can add pockets to your calendar by sewing them onto the pages, or by using adhesive to attach them.
Make it portable by attaching a handle or using a foldable design
Finally, you may want to make your DIY calendar portable by attaching a handle or using a foldable design. This will allow you to take your calendar with you wherever you go, and keep your schedule and to-do list organized no matter where you are. You can attach a handle to your calendar by sewing it onto the pages, or by using adhesive to attach it. Alternatively, you can use a foldable design to make your calendar more portable and easier to carry with you.
Frequently Asked Questions
Q: Are there any free calendars available online?
If you’re looking to create your own personalized calendar without spending any money, you might be wondering if there are any free calendars available online. The good news is that there are many websites that offer free printable calendars that you can use as a template for your DIY calendar crafts. Here are a few options to consider:
- Google Calendar: Google Calendar is a free online calendar that you can use to create and print your own custom calendar. You can choose from a variety of templates and customize them with your own photos, colors, and text.
- PrintableCalendar.net: PrintableCalendar.net offers a wide selection of free printable calendars in various styles and formats. You can choose from monthly calendars, weekly planners, and even yearly calendars with room for notes and reminders.
- Microsoft Printable Calendar: Microsoft offers a range of free printable calendars that you can customize with your own colors, photos, and text. You can choose from monthly calendars, weekly planners, and yearly calendars with holidays and observances.
Keep in mind that while these websites offer free calendars, you may still need to pay for any materials or supplies you need to create your DIY calendar crafts. Additionally, be sure to check the terms and conditions of each website to ensure that you’re allowed to use their templates for personal use.
A: Yes, there are many websites that offer free printable calendars. You can also find templates and designs to create your own custom calendar.
Creating your own personalized calendar is a fun and rewarding project. Not only can you choose the design and layout, but you can also include important dates and events that are specific to you. Fortunately, there are many resources available to help you get started.
One of the easiest ways to create your own custom calendar is by taking advantage of the many websites that offer free printable calendars. These sites often have a variety of templates and designs to choose from, so you can find one that fits your style and needs. Some popular options include:
- CalendarLabs: This site offers a wide range of printable calendars, including templates for annual, monthly, and weekly calendars. You can also customize the designs by adding your own photos or graphics.
- Printable-Calendars.com: This site has a large selection of printable calendars in a variety of styles, including minimalist, floral, and vintage. You can also customize the colors and fonts to match your preferences.
- Google Calendar: While not specifically a printable calendar site, Google Calendar offers a variety of customizable templates that you can use to create your own calendar. You can add your own photos, customize the colors and fonts, and even set reminders for important dates.
In addition to these online resources, you can also create your own custom calendar using templates and designs that you find online. Many craft stores and online marketplaces offer pre-made calendar templates that you can purchase and print at home. You can also find free templates on sites like Pinterest and Etsy.
No matter which method you choose, creating your own personalized calendar is a fun and creative way to stay organized throughout the year. With a little time and effort, you can create a calendar that reflects your style and helps you stay on track with your schedule.
Q: Can I use a digital calendar instead of a physical one?
In today’s fast-paced world, it’s no surprise that many people prefer the convenience of a digital calendar over a physical one. While there’s no right or wrong answer when it comes to choosing between the two, there are some things to consider before making your decision.
One of the biggest advantages of using a digital calendar is the ability to access it from anywhere with an internet connection. This means you can easily view and update your calendar on your computer, phone, or tablet, without having to carry around a physical calendar with you. Additionally, digital calendars often come with features like reminders, which can help you stay organized and on top of your schedule.
However, there are also some drawbacks to using a digital calendar. For one, it’s easy to get distracted by notifications and other distractions on your device, which can make it difficult to stay focused on your tasks. Additionally, some people find that they’re more likely to forget about important events or appointments when they’re not physically writing them down on a calendar.
Ultimately, the decision of whether to use a physical or digital calendar comes down to personal preference. Some people may find that a combination of both works best for them, using a physical calendar for daily planning and a digital calendar for longer-term planning and organization. Regardless of which option you choose, the most important thing is to find a system that works for you and helps you stay organized and on track throughout the year.
A: Yes, digital calendars are a convenient option for many people. However, creating a physical calendar can be a fun and rewarding DIY project.
While digital calendars offer a multitude of benefits, such as portability and easy access, there is something to be said for the tactile experience of creating a physical calendar. From the feel of the paper to the satisfaction of marking off completed tasks, there is a certain joy in crafting a personalized calendar.
In addition to the sensory benefits, creating a physical calendar allows for a level of customization that is not possible with a digital calendar. From choosing the size and shape of the calendar to selecting the colors and images used in the design, the possibilities for personalization are endless.
Furthermore, creating a physical calendar can be a great way to get crafty and use up some of the materials you may have lying around the house. From old magazines to scraps of fabric, there are endless options for incorporating unique elements into your calendar design.
Overall, while digital calendars may be convenient, creating a physical calendar can be a fun and rewarding DIY project that allows for endless customization and the opportunity to get creative with materials.
FAQs
1. Are there any free calendars available?
Yes, there are many websites that offer free printable calendars. These calendars can be printed out and used for personal or professional purposes. Some popular websites that offer free calendars include CalendarLabs, PrintableCalendars, and BlankCalendarPages.
2. Can I create my own calendar?
Yes, you can create your own calendar using various DIY calendar crafts. You can use materials such as cardboard, paper, markers, and glue to create a personalized calendar. You can also get creative and use materials such as old books, magazines, or even fabric to create a unique and personalized calendar.
3. How do I make a DIY calendar?
Making a DIY calendar is a fun and creative process. You can start by gathering materials such as cardboard, paper, markers, and glue. You can then sketch out the design of your calendar on paper and use it as a guide to create your calendar. You can also find tutorials online that provide step-by-step instructions for making a DIY calendar.
4. What size should my calendar be?
The size of your calendar depends on your personal preference and how you plan to use it. If you plan to hang your calendar on a wall, you may want to make it larger, such as 8.5 x 11 inches. If you plan to carry your calendar with you, you may want to make it smaller, such as 5 x 7 inches.
5. Can I print my calendar at home?
Yes, you can print your calendar at home using a printer. You can use a computer program such as Microsoft Word or Adobe Illustrator to create your calendar and then print it out on paper. You can also find websites that offer free printable calendars and print them out at home.