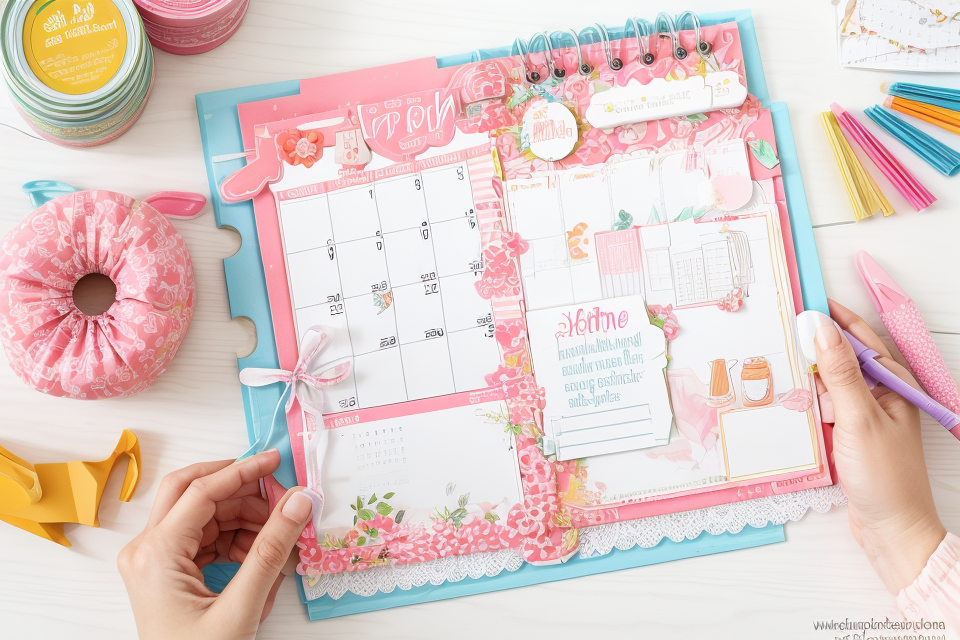
Are you a fan of calendars? Do you love the look of vintage and antique designs? If so, then you’ll love the art of decoupage calendar pages! Decoupage is the art of decorating an object by gluing colored paper, often in the form of a printed image, onto its surface. In this beginner’s guide, we’ll explore the basics of decoupage and how you can use it to create beautiful, one-of-a-kind calendars. Whether you’re a seasoned crafter or just starting out, this guide will provide you with all the tips and tricks you need to get started. So, let’s dive in and discover the magic of decoupage calendar pages!
What is Decoupage?
Definition and Brief History
Decoupage is an art form and technique that involves the application of paper cutouts, often from magazines or other printed materials, to a surface, such as a piece of furniture or a canvas, using a medium such as glue, varnish, or lacquer. The paper cutouts are then sealed with the medium, creating a durable and protective layer.
The origin of decoupage can be traced back to ancient civilizations, where it was used as a decorative technique for walls, furniture, and other objects. However, the modern form of decoupage as an art form gained popularity in the 19th century, particularly in France, where it was used to decorate objects with paper cutouts of floral designs and other patterns. Today, decoupage continues to be a popular and versatile craft, with countless applications in home decor, gift-making, and other DIY projects.
Decoupage Techniques
Decoupage is an art form that involves the application of decorative papers, images, and designs onto a surface, typically a piece of furniture or an object. It is a technique that dates back to the 17th century and has been used by artists and craftsmen ever since.
The basic principle of decoupage is to transfer an image or design from a piece of paper or fabric onto a surface using a medium such as glue or varnish. The paper is then smoothed out and the excess is trimmed off, leaving a beautiful, decorative finish.
There are several different techniques that can be used in decoupage, including:
- Single-layer decoupage: This is the most basic form of decoupage, where a single sheet of paper is used to cover the surface. This technique is ideal for small objects or areas that require a simple design.
- Multi-layer decoupage: This technique involves layering multiple sheets of paper on top of each other, with each layer slightly overlapping the previous one. This creates a more complex and textured finish.
- Image decoupage: This technique involves cutting out shapes and images from magazines, catalogs, or other printed materials, and applying them to the surface. This allows for a more customized and personalized finish.
- 3D decoupage: This technique involves adding a raised element to the surface, such as flowers or leaves, to create a more three-dimensional finish.
- Watercolor decoupage: This technique involves applying watercolor paint to the paper before applying it to the surface. This creates a unique, watercolor-like finish.
These are just a few of the many decoupage techniques that can be used to create beautiful and unique decorative pieces. Whether you’re a beginner or an experienced artist, decoupage is a fun and creative way to add a personal touch to your home decor.
Why Decoupage Calendar Pages?
Benefits of Decoupage Calendar Pages
Decoupage is a popular craft that involves attaching pieces of paper, fabric, or other materials to a surface using a mixture of water and flour glue. When it comes to creating a calendar, decoupage offers several benefits. Here are some of them:
- Customization: Decoupage allows you to create a unique calendar that reflects your personal style and interests. You can choose the images, colors, and patterns that appeal to you most and incorporate them into your calendar design.
- Versatility: Decoupage is not limited to just paper and fabric. You can use a wide range of materials, including magazines, book pages, gift wrap, and more, to create a one-of-a-kind calendar. This makes decoupage a great way to repurpose old materials and give them a new life.
- Durability: Once the glue has dried, the decoupage piece is quite durable and can withstand wear and tear. This makes it a practical choice for a calendar, which is likely to be handled frequently and exposed to wear and tear.
- Cost-effective: Compared to buying a ready-made calendar, creating your own decoupage calendar is a cost-effective option. You can use materials you already have on hand, and if you want to change the design every year, you can simply create a new decoupage piece rather than buying a new calendar.
- Therapeutic: Decoupage can be a therapeutic activity that helps to reduce stress and anxiety. The process of cutting, gluing, and arranging materials can be meditative and calming, making it a great activity to do during times of uncertainty or change.
Overall, decoupage calendar pages offer a fun and creative way to make a unique and personalized calendar that reflects your style and interests.
Creative Uses for Decoupage Calendar Pages
Decoupage is a popular DIY craft that involves decorating an object by applying a layer of paint or decoupage medium over a design, and then adhering cut-out pieces of paper, fabric, or other materials onto the surface. Decoupage calendar pages are a unique and creative way to personalize your calendar, add a pop of color, or showcase your favorite designs. Here are some creative uses for decoupage calendar pages:
Personalized Calendar Covers
One of the most popular uses for decoupage calendar pages is to create a personalized cover for your calendar. By choosing a design that reflects your interests or style, you can make your calendar stand out from the rest. You can use a variety of materials, such as patterned paper, magazine clippings, or vintage book pages, to create a unique and eye-catching design.
Artwork and Wall Decor
Decoupage calendar pages can also be used as artwork or wall decor. You can cut out individual months or full calendar pages and arrange them in a collage on a canvas or wooden board. This is a great way to showcase your favorite designs or create a seasonal display.
Journal Covers
Decoupage calendar pages can also be used to create beautiful journal covers. By cutting out individual months or full calendar pages, you can create a custom cover that reflects your style or interests. You can also add embellishments, such as buttons, ribbon, or beads, to add even more flair to your journal cover.
Gift Tags and Packaging
Finally, decoupage calendar pages can be used to create unique gift tags and packaging. You can cut out individual months or full calendar pages and attach them to gift boxes, bags, or tags. This is a great way to add a personal touch to your gifts and make them stand out.
Overall, decoupage calendar pages offer endless creative possibilities. Whether you want to personalize your calendar, create artwork, or add a personal touch to your gifts, decoupage is a fun and easy way to express your creativity.
Materials Needed for Decoupage Calendar Pages
Tools and Supplies
To create decoupage calendar pages, you will need the following tools and supplies:
- A piece of cardboard or thick paper to use as the base of your calendar.
- Scissors to cut the paper or magazine pages into the desired shapes and sizes.
- A ruler to help you make straight cuts.
- A utility knife or X-Acto knife to cut the pages more precisely.
- Mod Podge or another type of decoupage glue to adhere the paper to the cardboard or paper base.
- A brush or sponge to apply the glue evenly.
- A bone folder or other tool to help you smooth out any wrinkles or bubbles in the paper.
- A pair of scissors specifically designed for decoupage, such as the X-Acto craft knife, to create intricate designs and cut around the edges of the paper.
- A set of watercolors or other coloring tools to add additional design elements or color to your calendar pages.
It is important to note that these tools and supplies can vary depending on your personal preferences and the specific style of decoupage calendar you wish to create. Additionally, you may need to purchase additional materials such as cardboard or paper in specific sizes or colors to suit your project.
Preparing the Materials
Before beginning the decoupage process, it is important to prepare the necessary materials. Here is a list of the materials needed for creating decoupage calendar pages:
- Cardboard or cardstock: This is the base material for the calendar page. You can use thick cardboard or cardstock to create a sturdy page.
- Magazine pages or other paper: This is the paper that you will use to decoupage on the cardboard or cardstock. You can use old magazines, catalogs, or any other paper that you have on hand.
- Scissors: You will need scissors to cut the paper into the desired shapes and sizes.
- Mod Podge or other decoupage glue: This is the glue that you will use to adhere the paper to the cardboard or cardstock. Make sure to choose a glue that is specifically designed for decoupage.
- Brush or sponge: You will need a brush or sponge to apply the glue to the paper and the cardboard or cardstock.
- Bone folder or other tool: You can use a bone folder or other tool to help you create smooth and even edges on your calendar page.
By gathering these materials and following the steps outlined in the article, you can create a beautiful and unique decoupage calendar page.
Steps for Decoupage Calendar Pages
Step 1: Choose Your Materials
Creating a decoupage calendar requires careful consideration of the materials you will use. The success of your project depends on the quality of the materials you choose. Here are some factors to consider when selecting your materials:
- Paper: The most important material for decoupage is paper. You can use any type of paper, but it’s best to use heavyweight paper or cardstock to ensure that your calendar pages are sturdy and can withstand the wear and tear of daily use. Consider using scrapbooking paper, vintage book pages, or printed images that match your theme.
- Glue: Choose a high-quality glue that will provide a strong bond without leaving any residue. Decoupage glue or Mod Podge is ideal for this project. It comes in a variety of formulations, including matte, glossy, and waterproof. Select the one that best suits your needs.
- Craft Knife: You will need a craft knife to cut your paper into the shape of the calendar pages. Choose a sharp, high-quality blade to ensure clean cuts.
- Ruler: A ruler will help you to make straight cuts. Make sure it’s a precise one to ensure that your calendar pages are even.
- Sandpaper: Sandpaper is used to smooth out any rough edges after you’ve cut your paper. Choose a fine-grit sandpaper for best results.
- Painters Tape: This tape is used to protect the edges of your paper while you work on your calendar pages. It leaves no residue and can be easily removed after the glue has dried.
- Palette Knife: A palette knife is useful for smoothing out the glue and creating a smooth surface on your calendar pages.
Once you have gathered all of your materials, you can move on to the next step in creating your decoupage calendar pages.
Step 2: Prepare the Surface
Sanding the Surface
Before starting the decoupage process, it is essential to prepare the surface. This step is crucial because a rough or uneven surface can lead to bubbles and wrinkles in the final product. Start by sanding the surface with a fine-grit sandpaper to create a smooth and even surface. Make sure to sand in the direction of the grain for the best results.
Removing Glue Residue
If the surface has any glue residue, use a glue remover or rubbing alcohol to remove it. This step is important because glue residue can interfere with the adhesion of the decoupage medium. Be sure to follow the instructions on the glue remover or rubbing alcohol carefully, and allow the surface to dry completely before proceeding.
Cleaning the Surface
Once the surface is free of glue residue, use a clean cloth to wipe away any dust or debris. It is important to work in a well-ventilated area to avoid inhaling any dust or fumes.
Applying a Primer
To ensure that the decoupage medium adheres properly to the surface, apply a primer to the surface. A primer helps to create a uniform surface and improves the adhesion of the decoupage medium. Allow the primer to dry completely before moving on to the next step.
Tips for a Smooth Surface
To achieve a smooth surface, it is important to work carefully and patiently. If the surface is uneven or bumpy, try sanding it again with a finer-grit sandpaper. Additionally, make sure to use a primer that is compatible with the decoupage medium to ensure the best results.
By following these steps, you can prepare the surface for decoupage and create a beautiful and unique calendar that you can display in your home or give as a gift.
Step 3: Cut the Calendar Pages
Importance of Proper Cutting
Proper cutting of the calendar pages is crucial in the decoupage process. The right size and shape of the cut pieces will ensure that the calendar pages adhere well to the base material and result in a visually appealing finished product. Improper cutting can lead to uneven edges, wrinkles, and a messy final product.
Tools for Cutting
To cut the calendar pages, you will need a pair of scissors or a craft knife. It is recommended to use a pair of scissors to prevent accidental cuts and to maintain more control over the cutting process. However, a craft knife can be used for more precise cuts.
Cutting Techniques
To cut the calendar pages, follow these steps:
- Place the calendar page on a flat surface with the print facing up.
- Use the scissors or craft knife to cut around the shape of the desired image or design.
- If you are using a craft knife, make sure to apply light pressure and cut slowly to avoid tearing the paper.
- For more intricate designs, you can use a craft knife to make smaller cuts and create more detailed shapes.
Tips for Cutting
- Cut the calendar pages in a well-lit area to ensure that you have a clear view of the print and can make accurate cuts.
- If you are using a craft knife, use a ruler to guide your cuts for more precise results.
- Always cut away from your body to avoid accidental cuts.
- When cutting larger images or designs, it may be helpful to use a cutting mat to prevent the paper from warping or bending.
Common Mistakes to Avoid
- Rushing the cutting process can lead to uneven cuts and wrinkled paper. Take your time and make sure to cut slowly and carefully.
- Not using a ruler when using a craft knife can result in uneven cuts and a messy final product. Always use a ruler to guide your cuts.
- Not using a cutting mat when cutting larger images or designs can cause the paper to warp or bend, resulting in an uneven finished product.
Step 4: Apply the Decoupage Medium
Once you have prepared your materials and surfaces, it’s time to move on to the fourth step of the decoupage process: applying the decoupage medium. This is a crucial step in ensuring that your decoupage project turns out beautifully. Here’s what you need to know:
- Choose the right decoupage medium: There are two main types of decoupage medium: clear decoupage medium and matte decoupage medium. Clear decoupage medium is best for projects that need a glossy finish, while matte decoupage medium is better for projects that require a more subtle look. Choose the one that best suits your project’s needs.
- Apply the decoupage medium to your paper: Using a brush or a sponge, apply a thin layer of decoupage medium over your paper, making sure to cover the entire surface evenly. Be careful not to apply too much medium, as this can cause bubbles to form under the paper.
- Apply the decoupage medium to your surface: Once your paper is coated with decoupage medium, carefully place it onto your surface, making sure that it is centered and level. Use a brush or a sponge to apply a thin layer of decoupage medium over your surface, making sure to cover the entire surface evenly. This will help the paper adhere to the surface and prevent any air bubbles from forming.
- Allow the decoupage medium to dry: Once you have applied the decoupage medium to your paper and surface, allow it to dry completely. This can take anywhere from 30 minutes to several hours, depending on the type of decoupage medium you used and the environment in which you are working. Be patient and let the medium dry completely before moving on to the next step.
By following these steps, you can ensure that your decoupage calendar pages turn out beautifully. With a little bit of patience and attention to detail, you can create a unique and personalized calendar that you’ll love to display in your home or give as a gift to a loved one.
Step 5: Place the Calendar Pages
After you have prepared the surface, applied the decoupage medium, and allowed it to dry, it’s time to place the calendar pages onto the surface. This step is crucial to the final appearance of your decoupage calendar. Here are the steps to follow:
- Remove the pages from the calendar book gently. If the pages are stubborn, use a craft knife to cut along the edge of the page, being careful not to damage the image.
- Arrange the pages on the surface of the clock in the desired pattern. Make sure to use pages that match the theme of the clock, such as pages with images of nature or vintage illustrations.
- Use a ruler to ensure that the pages are straight and even.
- Once you are satisfied with the arrangement, apply a thin layer of decoupage medium over the top of the pages, using a brush or sponge. Be sure to cover the entire surface, including the edges.
- Allow the decoupage medium to dry completely, following the same steps as in step 3 of the previous section.
- Once the decoupage medium is dry, you can add any additional embellishments, such as stickers or embroidery, to enhance the appearance of the calendar pages.
Remember, this step is all about creating a beautiful and unique design for your decoupage calendar. Take your time and enjoy the creative process!
Step 6: Apply More Coats (Optional)
- Introduction:
Decoupage is a fun and creative way to personalize your calendar pages, adding a unique touch to your planner. However, the decoupage process is not always perfect, and you may need to apply more coats to achieve the desired effect. In this section, we will discuss the steps for applying additional coats of decoupage medium to your calendar pages. - Importance of Applying More Coats:
Applying more coats of decoupage medium can help to create a more durable and long-lasting finish on your calendar pages. It can also help to enhance the colors and images, making them more vibrant and eye-catching. - Steps for Applying More Coats:
- Allow the first coat to dry completely. This is important to ensure that the decoupage medium is fully set before applying additional coats.
- Apply a second coat of decoupage medium, using a soft cloth or brush to smooth out any bubbles or wrinkles. Be sure to cover the entire surface of the page, including any edges or corners.
- Allow the second coat to dry completely.
- If necessary, apply a third or fourth coat of decoupage medium, following the same steps as before. You can apply as many coats as needed to achieve the desired effect.
- Tips for Applying More Coats:
- Be patient and allow each coat to dry completely before applying the next one.
- Use a soft cloth or brush to apply the decoupage medium, rather than a spray bottle, to avoid any bubbles or wrinkles.
- Work in a well-ventilated area to avoid inhaling any fumes from the decoupage medium.
- If you notice any bubbles or wrinkles in the finish, you can gently smooth them out with a soft cloth or your fingers after the decoupage medium has dried.
- Conclusion:
Applying more coats of decoupage medium can help to create a more durable and long-lasting finish on your calendar pages. It can also help to enhance the colors and images, making them more vibrant and eye-catching. By following these steps and tips, you can achieve a beautiful and personalized calendar that you will enjoy using throughout the year.
Step 7: Finishing Touches
Once you have completed the decoupage process and your calendar pages are completely dry, it’s time to add the finishing touches. Here are some ideas to consider:
- Embellishments: Add embellishments such as stickers, glitter, or beads to your calendar pages to add more depth and interest to your design.
- Writing: Add writing to your calendar pages with a pen or marker to write down important dates, events, or appointments.
- Lamination: Consider laminating your calendar pages to protect them from water damage and to make them more durable.
- Hanging: Hang your calendar pages on a wall or use a clip to attach them to a desk or shelf.
By adding these finishing touches, you can create a unique and personalized calendar that reflects your style and personality. Don’t be afraid to experiment and try new things to create a truly one-of-a-kind piece of art.
Tips and Tricks for Decoupage Calendar Pages
Advanced Techniques
As you become more experienced with decoupage calendar pages, you may want to try some advanced techniques to take your crafting to the next level. Here are some ideas to consider:
- Multiple layers: Instead of just using one layer of paper, try using multiple layers to create a more complex and interesting design. This can be done by applying a layer of medium to the background, allowing it to dry, and then applying another layer of paper and medium. Repeat this process until you have built up the desired number of layers.
- Textured backgrounds: Adding texture to the background of your calendar page can add interest and dimension to your design. You can do this by using a variety of materials, such as fabric, paper, or even old maps or pages from books. Simply apply a layer of medium to the material and then adhere it to the background of your calendar page.
- Embellishments: Adding embellishments such as stickers, washi tape, or ribbon can add pops of color and interest to your calendar page. Experiment with different materials and arrangements to find what works best for your design.
- 3D elements: For a more unique and eye-catching calendar page, consider adding 3D elements such as cut-out shapes, buttons, or beads. These elements can be adhered to the background using medium, and can add depth and dimension to your design.
- Collages: Try creating a collage by arranging different papers, images, and other materials on your calendar page. This can be a fun and creative way to incorporate a variety of elements into your design.
Remember to experiment and have fun with your decoupage calendar pages. These advanced techniques can help you create unique and eye-catching designs that showcase your creativity and personal style.
Troubleshooting Common Problems
Decoupage is a fun and creative way to make your own calendars. However, like any craft, it can come with its own set of challenges. Here are some troubleshooting tips to help you navigate any issues that may arise during your decoupage calendar project:
Warping Pages
One common problem that decoupage enthusiasts may encounter is warping pages. This occurs when the pages become wrinkled or bent during the decoupage process. To fix this issue, try the following:
- Use a flat surface: Make sure to work on a flat surface to prevent the pages from warping.
- Use a heavy-duty paper trimmer: A heavy-duty paper trimmer can help ensure that your pages are cut straight and even, reducing the likelihood of warping.
- Use a bone folder: A bone folder can help smooth out any wrinkles or bubbles in the paper.
Bubbles or Wrinkles
Another common issue that may arise during decoupage is bubbles or wrinkles in the paper. To avoid this, try the following:
- Use a soft brush: A soft brush can help remove any excess moisture and prevent bubbles from forming.
- Allow the paper to dry completely: Make sure to allow the paper to dry completely before continuing with the decoupage process.
Drying Time
It’s important to allow the paper to dry completely before continuing with the decoupage process. This will help prevent any bubbles or wrinkles from forming. Depending on the type of paper and the size of the project, drying time can vary. To ensure that your paper is completely dry, try the following:
- Use a fan: A fan can help circulate the air and speed up the drying process.
- Use a hairdryer: A hairdryer can also help speed up the drying process. However, be careful not to overheat the paper, as this can cause damage.
- Allow enough time: Make sure to allow enough time for the paper to dry completely before continuing with the decoupage process.
By following these troubleshooting tips, you can avoid common issues that may arise during your decoupage calendar project. With a little patience and practice, you’ll be able to create beautiful and unique calendars that you can use throughout the year.
Inspiration for Decoupage Calendar Pages
Ideas for DIY Calendar Crafts
When it comes to DIY calendar crafts, the possibilities are endless. Here are a few ideas to get you started:
- Seasonal Decoupage Calendars: Create a seasonal theme for your decoupage calendar by using images of flowers, leaves, or other items that are specific to the season. This can add a touch of nature to your home and remind you of the changing seasons throughout the year.
- Travel-Themed Decoupage Calendars: If you love to travel, create a decoupage calendar using images of your favorite destinations. This can be a great way to remind yourself of past vacations or plan for future ones.
- Holiday-Themed Decoupage Calendars: Use images of holidays or special events to create a unique decoupage calendar. This can be a fun way to celebrate the holidays or commemorate special events throughout the year.
- Vintage-Inspired Decoupage Calendars: If you love vintage style, create a decoupage calendar using images from old books, magazines, or postcards. This can add a unique touch to your home and showcase your love of vintage style.
- Personalized Decoupage Calendars: Create a personalized decoupage calendar using images that are meaningful to you. This can include family photos, favorite quotes, or images of your favorite hobbies or interests.
No matter what type of decoupage calendar you create, the key is to have fun and get creative. With a little bit of time and effort, you can create a unique and beautiful piece of art that will add a touch of personality to your home.
Showcasing Your Decoupage Calendar Pages
When it comes to showcasing your decoupage calendar pages, there are several options to consider. You can choose to display your creation on a wall, place it on a tabletop, or even create a stand to hold it upright. Here are some ideas to help you showcase your decoupage calendar pages in a way that suits your style and space.
Displaying on a Wall
One of the most popular ways to showcase a decoupage calendar page is by hanging it on a wall. You can use picture frames in various sizes to create a gallery-like display, or you can create a larger frame to highlight a single page. You can also use command strips or nails to hang your decoupage calendar pages directly on the wall, especially if you want to change the display each month.
Placing on a Tabletop
Another option is to place your decoupage calendar pages on a tabletop. This is a great option if you want to display your calendar in a specific room, such as a living room or dining room. You can use a small table or a stack of books to create a surface for your calendar page, and you can arrange other decorative items around it to add interest.
Creating a Stand
If you want to display your decoupage calendar pages upright, you can create a stand to hold it in place. You can use cardboard or foam board to create a base, and then add some supports to hold the page in place. You can also add decorative elements to the stand to match the style of your calendar page.
Choosing the Right Frame
When it comes to framing your decoupage calendar pages, it’s important to choose the right frame. You want to choose a frame that complements the style of your calendar page and enhances its beauty. You can choose a simple wooden frame or a more ornate metal frame, depending on your preference. You can also choose a matte or a glossy finish, depending on the look you want to achieve.
Considering the Size of the Frame
The size of the frame you choose will depend on the size of your calendar page. If you have a large page, you may want to choose a larger frame to make it stand out. If you have a smaller page, you can choose a smaller frame that still complements the style of your page.
Displaying Multiple Calendar Pages
If you have multiple decoupage calendar pages, you can display them together to create a unique and personalized wall art. You can choose to display them in a grid pattern, or you can arrange them in a more random pattern to create a unique visual effect. You can also choose to highlight one page each month to add variety to your display.
Making Your Decoupage Calendar Pages Stand Out
To make your decoupage calendar pages stand out, you can add some personal touches to your display. You can add decorative elements such as ribbons, flowers, or other embellishments to enhance the beauty of your calendar page. You can also add some lighting to create a dramatic effect, or you can add some props to create a more dynamic display.
By following these tips, you can showcase your decoupage calendar pages in a way that enhances their beauty and adds interest to your space. Whether you choose to display them on a wall, on a tabletop, or with a stand, you can create a unique and personalized display that reflects your style and personality.
FAQs
1. What is decoupage?
Decoupage is an art form and a technique of decorating an object by applying multiple layers of paper cutouts, varnish or lacquer to create a unique design. It involves gluing tissue paper, newspaper clippings, magazine pages, and other paper ephemera onto a surface, often with the help of a varnish or lacquer to seal the pieces in place.
2. What are calendar pages, and can they be used for decoupage?
Calendar pages are typically a daily, weekly, or monthly calendar that is often printed on paper. They can be used for decoupage, as they provide a rich source of designs, colors, and patterns that can be used to create unique and personalized art pieces. The pages can be cut into shapes, strips, or used whole, and then glued onto a surface to create a collage.
3. What materials do I need for decoupage with calendar pages?
To start decoupage with calendar pages, you will need the following materials:
* Old calendar pages
* A piece of wood, cardboard, or any other surface to decoupage
* A craft knife or scissors
* PVA glue or any other decoupage medium
* A sealant, such as varnish or lacquer
* A paintbrush or a sponge
* A piece of cloth or paper towels
4. How do I prepare the surface for decoupage with calendar pages?
Before starting decoupage with calendar pages, it is important to prepare the surface. Clean the surface with a damp cloth to remove any dust or dirt. If you are using wood, sand it lightly to create a smooth surface. Apply a coat of PVA glue or any other decoupage medium to the surface using a paintbrush or a sponge. Allow the glue to dry completely before proceeding with the decoupage process.
5. How do I cut the calendar pages for decoupage?
To cut the calendar pages for decoupage, use a craft knife or scissors to cut the pages into the desired shapes and sizes. You can cut the pages into small pieces and arrange them in a pattern, or cut them into larger shapes to create a more dramatic effect. Make sure to cut the pages along the edges of the design, rather than through the middle, to avoid damaging the paper.
6. How do I apply the calendar pages to the surface for decoupage?
Once you have cut the calendar pages into the desired shapes and sizes, you can start applying them to the surface. Apply a thin layer of PVA glue or any other decoupage medium to the back of the paper pieces, and then press them onto the surface. Make sure to smooth out any bubbles or wrinkles as you go along. Allow the glue to dry completely before proceeding with the next step.
7. How do I seal the decoupage with calendar pages?
After you have applied the calendar pages to the surface, you need to seal them in place with a sealant, such as varnish or lacquer. Apply a thin layer of sealant to the entire surface, using a paintbrush or a sponge, and allow it to dry completely. Once the sealant is dry, you can add additional layers if desired, or add more calendar pages to create a more complex design.
8. What are some tips for decoupage with calendar pages?
Here are some tips to keep in mind when decoupaging with calendar pages:
* Experiment with different calendar pages to find the designs and colors that work best for you.
* Use a variety of shapes and sizes of paper pieces to create a more interesting and dynamic design.
* Apply the glue and sealant in thin layers to create a smooth and even finish.
* Be patient and take your time to ensure that your decoupage project turns out beautifully.