Are you tired of using the same boring calendar every year? Do you want to create a personalized calendar that reflects your style and personality? Look no further! In this step-by-step guide, we will show you how to design a calendar that is uniquely yours. From choosing a theme to adding personal touches, we will walk you through the process of creating a calendar that you will love. So grab a pen and paper, and let’s get started on this exciting journey of designing your very own personalized calendar!
Setting the Goal and Purpose
Defining Your Calendar’s Purpose
When designing a personalized calendar, the first step is to define the purpose of the calendar. This will serve as the foundation of your calendar’s design and will guide you in selecting the most appropriate features and functionalities.
To define your calendar’s purpose, consider the following questions:
- What is the main objective of your calendar? Is it to manage your schedule, track your tasks, or keep tabs on important dates and events?
- Who will be using the calendar? Is it for personal use or will it be shared with others, such as family members or colleagues?
- What type of information do you want to include in your calendar? Will it be limited to work-related events or will it also include personal appointments and commitments?
Defining the purpose of your calendar will help you determine the type of layout, format, and features that will best suit your needs. For example, if your calendar is primarily for scheduling work-related events, you may want to prioritize features such as task management and collaboration tools. On the other hand, if your calendar is for personal use, you may want to focus on including space for notes and reminders.
By taking the time to define the purpose of your calendar, you will be able to create a customized tool that meets your specific needs and helps you stay organized and on track.
Identifying Your Target Audience
Before designing a personalized calendar, it is crucial to identify your target audience. This will help you tailor your calendar to their specific needs and preferences. To identify your target audience, consider the following factors:
- Demographics: Age, gender, occupation, income, education level, and location are all demographic factors that can influence the design of your calendar.
- Psychographics: Lifestyle, personality, values, interests, and habits are all psychographic factors that can impact the design of your calendar.
- Goals and objectives: What are the goals and objectives of the people who will be using your calendar? Are they looking to increase productivity, manage time better, or achieve specific tasks?
By understanding your target audience, you can create a calendar that is both functional and appealing to them. This will increase the chances of them using it regularly and achieving their desired outcomes.
Planning and Designing the Calendar
Choosing the Calendar Format
When it comes to designing a personalized calendar, one of the first decisions you need to make is choosing the calendar format. There are several types of calendar formats available, each with its own set of advantages and disadvantages.
Here are some of the most popular calendar formats:
- Monthly calendar: This type of calendar shows a full month at a time, making it easy to see at a glance what events are happening throughout the month. It’s a great option if you need to keep track of multiple appointments and events.
- Weekly calendar: This type of calendar shows a full week at a time, making it easy to see what events are happening on a day-to-day basis. It’s a great option if you need to keep track of appointments and events that are happening on a specific day of the week.
- Daily calendar: This type of calendar shows a day at a time, making it easy to see what events are happening on a specific day. It’s a great option if you need to keep track of appointments and events that are happening on a specific day.
- Agenda-style calendar: This type of calendar shows a list of appointments and events in chronological order, with space for notes and reminders. It’s a great option if you need to keep track of multiple appointments and events, and want to see them in a more detailed format.
When choosing a calendar format, consider your own personal needs and preferences. Do you prefer to see a full month at a time, or do you need to see a day-to-day breakdown of events? Do you need space for notes and reminders, or do you prefer a more streamlined format?
Once you’ve chosen a calendar format, you can start planning and designing your personalized calendar. The next step is to decide on the layout and design of your calendar, which we’ll cover in the next section.
Deciding on the Content and Layout
When designing a personalized calendar, one of the first steps is to decide on the content and layout. This involves determining what information will be included on the calendar, and how it will be arranged on the pages. Here are some factors to consider when deciding on the content and layout of your personalized calendar:
Determine the Purpose of the Calendar
The first step in deciding on the content and layout of your personalized calendar is to determine its purpose. Are you creating a calendar to track your daily tasks and appointments, or to serve as a reminder of important dates and events? Understanding the purpose of the calendar will help you determine what information to include and how to arrange it.
Decide on the Information to Include
Once you have determined the purpose of the calendar, you can decide on the information to include. Some common items to include on a personalized calendar are:
- Important dates and events (e.g. birthdays, anniversaries, holidays)
- Appointments and meetings
- To-do lists and tasks
- Reminders and notes
- Goals and objectives
It’s important to consider what information is most relevant to your needs and goals, and to prioritize it accordingly.
Choose a Layout and Design
After deciding on the content of the calendar, you can choose a layout and design. This involves determining the size and shape of the calendar, as well as the font and color scheme. Here are some factors to consider when choosing a layout and design:
- Size and shape: The size and shape of the calendar will depend on your personal preferences and the amount of information you want to include. A small calendar may be more suitable for tracking daily tasks, while a larger calendar may be better for displaying important dates and events.
- Font and color scheme: The font and color scheme of the calendar should be easy to read and visually appealing. Choose a font that is clear and easy to read, and select a color scheme that reflects your personal style and preferences.
By carefully considering the content and layout of your personalized calendar, you can create a tool that helps you stay organized and focused throughout the year.
Incorporating Personalized Elements
Creating a personalized calendar requires more than just inputting important dates and events. To make it truly reflective of your life and personality, you need to incorporate personalized elements that reflect your interests, values, and priorities. Here are some tips for incorporating personalized elements into your calendar:
- Choose a theme or color scheme that reflects your personality and interests. For example, if you love nature, you might choose a calendar with a natural theme, such as flowers, trees, or animals. Or, if you have a favorite sports team, you could choose a calendar with their logo or colors.
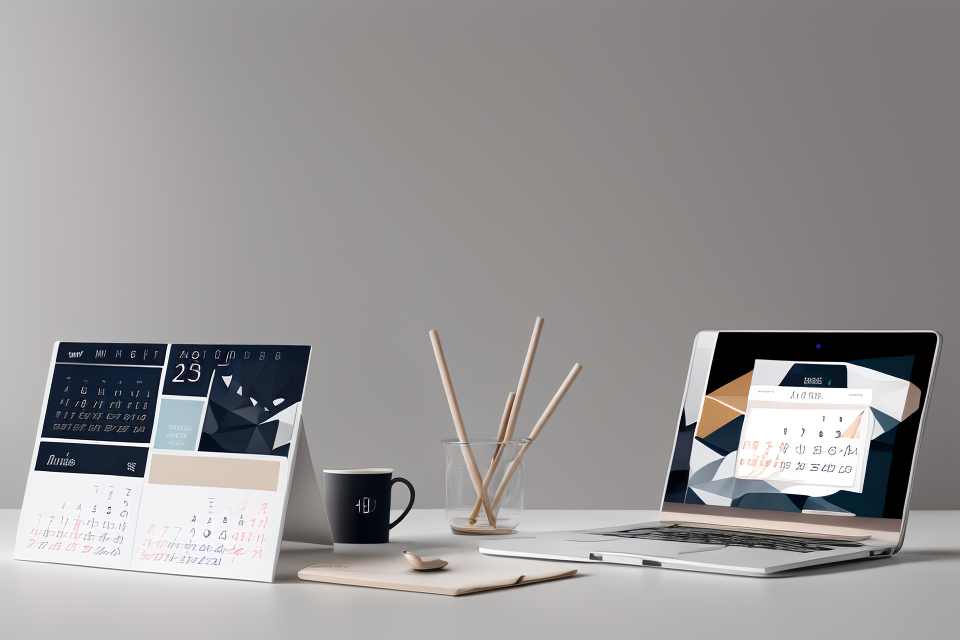
- Use images or graphics to personalize your calendar. You can find images online or take your own photos to use as backgrounds or to decorate specific months or holidays. For example, you might use a photo of your family or pets for the month of December, or a photo of your favorite vacation spot for the month of July.
- Customize the layout and design of your calendar. Most calendars offer different layouts and designs to choose from, but you can also create your own layout using a design program or online tool. Consider adding extra columns or sections for notes or reminders, or incorporating unique shapes or patterns into the design.
- Use symbols or icons to represent important events or tasks. Instead of just writing out the details of an event or task, you can use symbols or icons to quickly identify them at a glance. For example, you might use a heart symbol to represent special occasions like birthdays or anniversaries, or a lightning bolt symbol to represent important deadlines.
- Personalize the text and fonts used in your calendar. You can choose different fonts, colors, and styles for the text in your calendar to make it more personalized and visually appealing. For example, you might use a bold, fun font for important events or a more elegant font for special occasions.
By incorporating personalized elements into your calendar, you can create a tool that not only helps you stay organized but also reflects your unique personality and interests.
Creating a Prototype
Creating a prototype is an essential step in designing a personalized calendar. It involves creating a rough draft of the calendar to help you visualize how it will look and function. The prototype should be simple and basic, yet effective in showcasing the design elements and layout of the calendar.
Here are some tips for creating a prototype:
- Choose the right tools: There are many tools available for creating a prototype, such as paper and pencil, digital design software, or online prototyping tools. Choose the tool that works best for you and your design skills.
- Start with a basic layout: Begin by sketching out a basic layout of the calendar on your chosen medium. Include the basic elements such as the date, day of the week, and any important notes or reminders.
- Experiment with design elements: Once you have a basic layout, start experimenting with design elements such as colors, fonts, and graphics. Consider how these elements will help you achieve your design goals and personalize your calendar.
- Test and refine: Test your prototype by using it for a week or so to see how it works in practice. Take note of any issues or challenges you encounter and refine your design accordingly.
By creating a prototype, you can quickly and easily test and refine your design ideas before investing too much time and effort into the final product. It also helps you to identify potential problems and make changes before they become more difficult and time-consuming to fix.
Implementing and Refining the Calendar
Gathering Feedback
Gathering feedback is a crucial step in the process of designing a personalized calendar. It involves soliciting opinions and suggestions from individuals who will be using the calendar. The goal is to ensure that the calendar meets the needs and preferences of its users. Here are some ways to gather feedback:
- Surveys: Surveys are a useful tool for gathering feedback from a large number of people. They can be administered online or in person, and can include both closed-ended and open-ended questions. Surveys can provide valuable insights into what features users find most important, what they like and dislike about the calendar, and what improvements they would like to see.
- Focus groups: Focus groups involve gathering a small group of individuals and conducting a discussion on a particular topic. This method is useful for gathering in-depth feedback and understanding the underlying reasons behind users’ opinions. It can also help identify common themes and issues that may not have been apparent from surveys or individual interviews.
- User testing: User testing involves observing individuals as they use the calendar and asking them to provide feedback on their experience. This method can provide valuable insights into how users interact with the calendar and identify any usability issues that may need to be addressed.
- Individual interviews: Individual interviews involve conducting one-on-one conversations with users to gather feedback on the calendar. This method can provide detailed and personalized feedback and can be especially useful for identifying specific issues or concerns.
By gathering feedback from users, designers can make informed decisions about how to improve the calendar and ensure that it meets the needs and preferences of its users. It is important to carefully consider the feedback received and make changes that are feasible and align with the overall goals of the calendar.
Making Changes and Improvements
Creating a personalized calendar that suits your needs and preferences requires a willingness to make changes and improvements as you go along. Here are some tips to help you make the most out of your calendar:
Regular Review and Adjustment
One of the most important steps in making changes and improvements to your calendar is to regularly review and adjust it. Set aside some time each week or month to evaluate how well your calendar is working for you. Ask yourself questions like:
- Are all of my appointments and events listed correctly?
- Am I using the right categories and labels for my tasks and events?
- Is there anything I can do to make my calendar more efficient or easier to use?
By regularly reviewing and adjusting your calendar, you can identify areas that need improvement and make changes to better suit your needs.
Seeking Feedback
Another way to make changes and improvements to your calendar is to seek feedback from others. Share your calendar with a friend or colleague and ask for their input. They may be able to offer suggestions or identify areas where you could improve your organization or time management.
Experimenting with Different Layouts and Formats
Finally, don’t be afraid to experiment with different layouts and formats for your calendar. There are many different ways to organize your time and tasks, and what works for one person may not work for another. Try out different layouts and formats to find what works best for you. You may find that a different type of calendar, such as a weekly or monthly view, works better for you than a daily view. Or, you may prefer to use a digital calendar rather than a physical one. The key is to be open to trying new things and finding what works best for you.
In conclusion, making changes and improvements to your personalized calendar is an ongoing process that requires regular review and adjustment, seeking feedback from others, and experimenting with different layouts and formats. By following these tips, you can create a calendar that truly works for you and helps you stay organized and on track.
Finalizing the Design
Finalizing the design of your personalized calendar involves making the necessary adjustments to ensure that it meets your specific needs and preferences. Here are some key steps to consider when finalizing the design:
- Review your goals and objectives: Before finalizing the design, it’s important to review your goals and objectives for the calendar. Are you looking to prioritize specific tasks or events? Do you need to track specific deadlines or milestones? Make sure that the design reflects your goals and objectives.
- Test the calendar: Once you have finalized the design, it’s important to test the calendar to ensure that it works for you. Try using the calendar for a week or two to see how it performs in real-world scenarios. Make note of any issues or challenges that arise and make adjustments as necessary.
- Refine the design: Based on your testing, refine the design of the calendar as needed. This may involve making adjustments to the layout, color scheme, or other elements of the calendar. The goal is to create a calendar that is both functional and visually appealing.
- Personalize the calendar: Finally, personalize the calendar by adding your own touches, such as photos or images that reflect your interests or hobbies. This will help make the calendar more meaningful and enjoyable to use.
By following these steps, you can finalize the design of your personalized calendar and create a tool that helps you stay organized and productive throughout the year.
Sharing and Distributing the Calendar
Choosing the Distribution Channel
When it comes to sharing and distributing your personalized calendar, choosing the right distribution channel is crucial. There are several options available, each with its own advantages and disadvantages. Here are some of the most popular distribution channels to consider:
Email is one of the most common ways to share calendars. It’s simple, convenient, and most people have access to email. To share your calendar via email, you can simply attach the calendar file to your email or share a link to the calendar file stored in the cloud. One of the biggest advantages of email is that it allows you to send updates and changes to your calendar directly to your recipients. However, it’s important to note that email inboxes can quickly become cluttered, and your calendar may get lost in a sea of other emails.
Cloud Storage
Cloud storage services like Google Drive, Dropbox, and OneDrive offer a convenient way to share your calendar with others. You can upload your calendar file to the cloud and then share a link to the file with your recipients. This method allows multiple people to access the calendar simultaneously, and it’s also a good option if you need to update the calendar frequently. One downside of cloud storage is that not everyone may have access to these services, and it may require some additional setup on the part of your recipients.
Printing
If you prefer a more traditional approach, you can print your calendar and distribute it via hard copy. This method is great for those who prefer to have a physical copy of their calendar and who may not have access to digital devices. However, it’s important to note that printing can be time-consuming and expensive, especially if you need to print multiple copies.
Mobile Apps
Mobile apps like Google Calendar, Outlook, and Apple Calendar offer a convenient way to share your calendar with others. You can simply add your recipients to your calendar, and they will receive notifications when events are added or updated. This method is great for those who are always on the go and need access to their calendar on their mobile device. However, it’s important to note that not everyone may have access to these apps, and it may require some additional setup on the part of your recipients.
In conclusion, choosing the right distribution channel for your personalized calendar depends on your specific needs and preferences. Whether you choose email, cloud storage, printing, or mobile apps, make sure to consider the advantages and disadvantages of each option before making a decision.
Promoting the Calendar
After you have designed your personalized calendar, it’s time to share it with others. Promoting your calendar can help you reach a wider audience and get more people interested in your brand or cause. Here are some ways to promote your calendar:
- Social Media: Social media platforms like Facebook, Twitter, and Instagram are great places to promote your calendar. Share pictures of your calendar and use relevant hashtags to reach a larger audience. You can also use paid advertising on these platforms to reach more people.
- Email Marketing: Email marketing is an effective way to reach your existing customers and promote your calendar. Send out newsletters and promotional emails to your email list, encouraging them to check out your calendar and purchase it.
- Website: If you have a website, promote your calendar on your homepage or a dedicated page. You can also offer a free download of your calendar as a way to encourage visitors to sign up for your email list.
- Collaborations: Collaborate with other brands or businesses that align with your brand or cause. You can offer to create a joint calendar with them or feature their brand on your calendar in exchange for promotion.
- Influencer Marketing: Reach out to influencers in your niche and ask them to promote your calendar on their social media accounts or in their blog posts.
By using these strategies, you can effectively promote your personalized calendar and reach a wider audience. Remember to track your results and adjust your promotional efforts as needed to ensure maximum success.
Monitoring Engagement and Feedback
Monitoring engagement and feedback is a crucial step in the process of sharing and distributing your personalized calendar. It helps you to gauge the effectiveness of your calendar and make necessary adjustments to improve its performance. Here are some ways to monitor engagement and feedback:
Analyzing Calendar Metrics
One way to monitor engagement and feedback is by analyzing calendar metrics. This includes metrics such as the number of views, clicks, and interactions with the calendar. By tracking these metrics, you can determine how well your calendar is performing and identify areas that need improvement.
Soliciting Feedback
Another way to monitor engagement and feedback is by soliciting feedback from users. This can be done through surveys, focus groups, or one-on-one interviews. By gathering feedback from users, you can gain insight into their experiences with the calendar and identify areas for improvement.
Responding to Feedback
It’s important to respond to feedback from users in a timely and effective manner. This shows that you value their input and are committed to improving the calendar. When responding to feedback, it’s important to be open and transparent about the changes you plan to make and the reasons behind them.
Making Adjustments
Based on the feedback and metrics you gather, you can make adjustments to your calendar to improve its performance. This may include making changes to the design, functionality, or content of the calendar. It’s important to continuously monitor and evaluate the effectiveness of these changes to ensure they are having the desired impact.
Overall, monitoring engagement and feedback is a critical step in the process of sharing and distributing your personalized calendar. By analyzing metrics, soliciting feedback, responding to feedback, and making adjustments, you can improve the performance of your calendar and ensure it meets the needs of its users.
Iterating and Improving
After you have created your personalized calendar, it’s important to share it with others and get feedback. This will help you make any necessary improvements and ensure that your calendar is effective in meeting your needs. Here are some steps you can take to iterate and improve your calendar:
- Share your calendar with others: Share your calendar with family members, friends, or colleagues who may provide valuable feedback. You can also consider sharing it with online communities or forums related to productivity or time management.
- Ask for feedback: Reach out to those who have seen your calendar and ask for their feedback. This can help you identify areas where your calendar may be unclear or confusing, and provide you with suggestions for improvement.
- Analyze your usage: Pay attention to how you use your calendar over the course of a few weeks. Are there any areas where you find yourself struggling or feeling overwhelmed? Use this feedback to make adjustments to your calendar as needed.
- Make improvements: Based on the feedback you receive and your own analysis of your usage, make any necessary improvements to your calendar. This may involve adjusting your schedule, adding or removing tasks or events, or making changes to the layout or design of your calendar.
- Repeat the process: Iterating and improving your calendar is an ongoing process. Continue to share your calendar with others, seek feedback, and make improvements over time to ensure that your calendar remains effective and meets your needs.
Summarizing the Key Takeaways
Upon completion of designing your personalized calendar, the next step is to share and distribute it to those who need access to it. Here are some key takeaways to keep in mind when sharing and distributing your calendar:
- Consider the purpose of sharing the calendar: Determine who needs access to the calendar and what the purpose of sharing it is. This will help you decide on the level of detail and format of the calendar that you will share.
- Choose the appropriate format: Depending on the purpose of sharing the calendar, you may need to choose a different format. For example, if you need to share the calendar with a team, you may want to share it in a digital format that can be accessed online.
- Provide clear instructions: Ensure that those who need access to the calendar understand how to use it. Provide clear instructions on how to access the calendar, how to navigate it, and how to add or modify events.
- Review and update regularly: Your calendar should be a living document that is reviewed and updated regularly. Make sure that those who have access to the calendar are aware of the review and update schedule, and ensure that they have the necessary information to make any necessary changes.
By following these key takeaways, you can ensure that your personalized calendar is effectively shared and distributed to those who need access to it.
Encouraging Further Exploration and Learning
One of the main objectives of creating a personalized calendar is to promote further exploration and learning. By sharing the calendar with others, individuals can spark meaningful conversations and encourage others to engage in self-reflection and personal growth. Here are some strategies for encouraging further exploration and learning through calendar sharing:
- Host a Workshop or Group Discussion:
Hosting a workshop or group discussion around the calendar can be a great way to engage others in meaningful conversations. This can be done in person or online, and can involve breaking down the calendar into smaller sections or themes, and discussing each one in detail. By facilitating a group discussion, individuals can learn from each other’s experiences and perspectives, and gain new insights into their own lives. - Share the Calendar on Social Media:
Sharing the calendar on social media platforms such as Instagram, Twitter, or Facebook can help to reach a wider audience and spark further conversation. By including relevant hashtags and tagging others in the post, individuals can connect with others who are interested in personal growth and development. This can also be a great way to receive feedback and ideas for future calendars. - Collaborate with Others:
Collaborating with others on a personalized calendar can be a great way to encourage further exploration and learning. By working together to create a calendar, individuals can share their own experiences and perspectives, and learn from each other’s strengths and weaknesses. This can also be a great way to build connections and collaborate on future projects. - Offer a Free Printable Version:
Offering a free printable version of the calendar can be a great way to encourage others to engage with the content and explore their own personal growth journeys. By making the calendar available for free, individuals can easily share it with others and encourage them to engage in self-reflection and personal growth.
Overall, sharing and distributing a personalized calendar can be a powerful tool for encouraging further exploration and learning. By using a variety of strategies, individuals can engage with others and promote meaningful conversations around personal growth and development.
FAQs
1. What software can I use to design my calendar?
There are many software options available for designing a calendar, including Microsoft Publisher, Adobe InDesign, and Canva. The software you choose will depend on your design skills and personal preference. If you’re new to design, Canva is a great option as it has pre-designed templates and is user-friendly.
2. How do I choose a layout for my calendar?
When choosing a layout for your calendar, consider your personal preferences and how you plan to use the calendar. A traditional grid layout is a popular choice, but you can also consider a vertical layout or a layout with more white space. The key is to choose a layout that is easy to read and use.
3. How should I choose colors for my calendar?
When choosing colors for your calendar, consider the overall theme and mood you want to create. For example, if you’re creating a calendar for a spa, you might choose calming colors like blue and green. If you’re creating a calendar for a fitness studio, you might choose bold and energetic colors like red and orange. You can also consider using a color scheme that matches your branding.
4. How do I add images to my calendar?
To add images to your calendar, you can search for royalty-free images online or use your own photos. Once you have your images, you can add them to your calendar using design software. Make sure to size the images appropriately and save them in a high-resolution format.
5. How should I format the dates on my calendar?
When formatting the dates on your calendar, it’s important to use a clear and easy-to-read font. You can also choose to include holidays and other important dates, or leave them off depending on your preference. The key is to format the dates in a way that is easy for you to use and reference throughout the year.
6. How do I print my calendar?
Once you’ve designed your calendar, you can print it at home or take it to a professional printing service. Make sure to choose a high-quality printer and paper to ensure that your calendar looks professional and lasts throughout the year.